Let’s look at another Content Query Webpart (CBQ) hack, following up on my previous post on a CBQ method to access the webpart title in your XSLT. As before, this next hack will also work in SharePoint Online, SharePoint 2013, SharePoint 2010 (and 2007 for the truly brave souls).
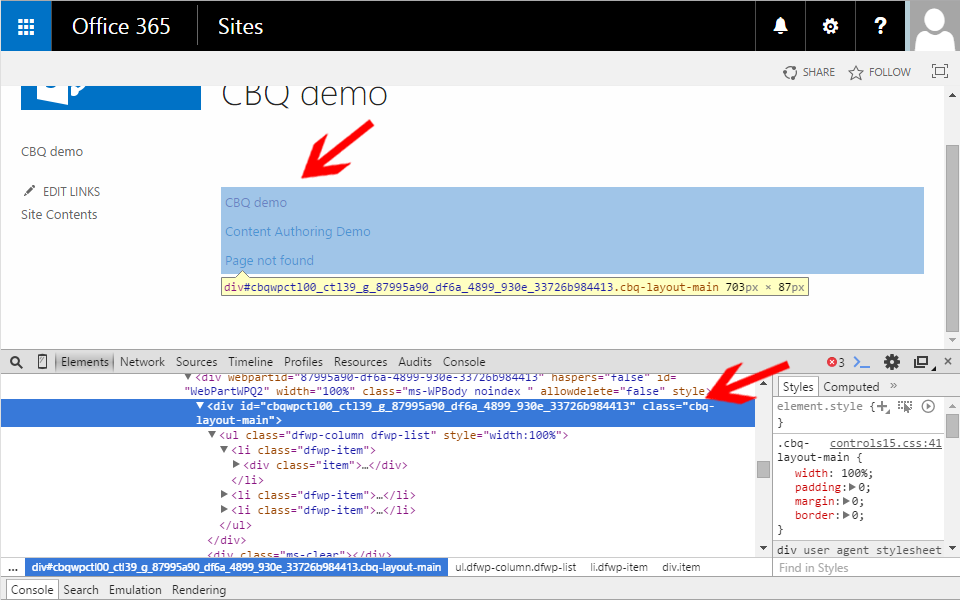
One of my pet peeves with the Content Query Webpart has to be that all query results are encapsulated in a similar div with a unique id based on the client id (this changes though too often to target) and a common class, “.cbq-layout-main“.
More often than not, my projects require styling specific CBQ results based on the selected Item Style. Including a wrapper with my own custom class would take me a long way to achieving the goal of one shared ContentQueryMain.xsl and ItemStyle.xsl for all of the CBQ’s used in a particular branding initiative. The most straightforward way to accomplish this would be to reference a particular CBQ’s selected Item Style in the ContentQueryMain.xsl XSL Style Sheet and then include additional rendering logic dependent on said Item Style.
Reference the Selected Item Style in ContentQueryMain.xsl
It ends up it is quite simple to access the selected Item Style in ContentQueryMain.xsl. Each returned row includes with it the item style for the query in question. All we need to do is look at the @Style property of any row and we have what we need.
In the following walk-through, we am going to update the XSL template OuterTemplate in ContentQueryMain.xsl. In this template, before calling OuterTemplate.Body, we will use a <xsl:choose /> block and based on the item style, we will wrap our OuterTemplate.Body in a specific div wrapper with a different class name so that we may target specific results with specific CSS later on.
Note: For reasons of simplicity I am going to make edits to the OOTB contentquerymain.xsl XSL Style Sheet for this walk-through. This is never best practices, you should always create a custom ContentQueryMain.xsl file and point your CBQ’s to use this custom XSL Style Sheet instead. Let’s be honest though, most of you are not doing this, and it is easier to demo without having to first link to a custom .xsl file.
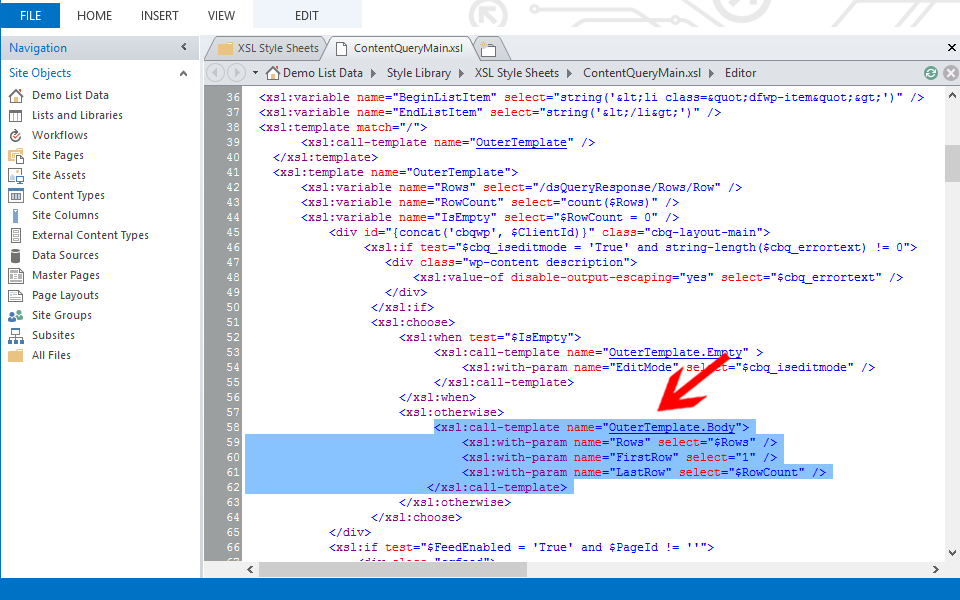
In ContentQueryMain.xsl (found in /Style Library/XSL Style Sheets), find the OuterTemplate template, and within this template, look for the call to OuterTemplate.Body.
Replace the entire call to OuterTemplate.Body with the following code.
1 2 3 4 5 6 7 8 9 10 11 12 13 14 | <xsl:choose> <xsl:when test="$Rows/@Style='Default'"> <xsl:value-of disable-output-escaping="yes" select="string('<div class="myCustomClass">')" /> </xsl:when> <xsl:otherwise> <xsl:value-of disable-output-escaping="yes" select="string('<div class="generalClass">')" /> </xsl:otherwise> </xsl:choose> <xsl:call-template name="OuterTemplate.Body"> <xsl:with-param name="Rows" select="$Rows" /> <xsl:with-param name="FirstRow" select="1" /> <xsl:with-param name="LastRow" select="$RowCount" /> </xsl:call-template> <xsl:value-of disable-output-escaping="yes" select="string('</div>')" /> |
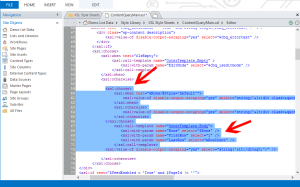 Notice how we access @Style, by referencing the $Rows variable that was set in the beginning of the template. $Rows is a reference to /dsQueryResponse/Rows/Row. Essentially you can get the selected item style in OuterTemplate using either of the following calls.
1 | $Rows/@Style |
1 | /dsQueryResponse/Rows/Row/@Style |
Other than that, you can see how we had to create the opening and closing div tags using <xsl:value-of value=”string(”) /> calls because remember we cannot have HTML tags that do not properly close within the XSLT itself. Because we are “choosing” how the opening DIV tag should appear, we must, in a sense, hide the closing DIV so that the XML parser considers our XSLT valid.
Where to find item style values?
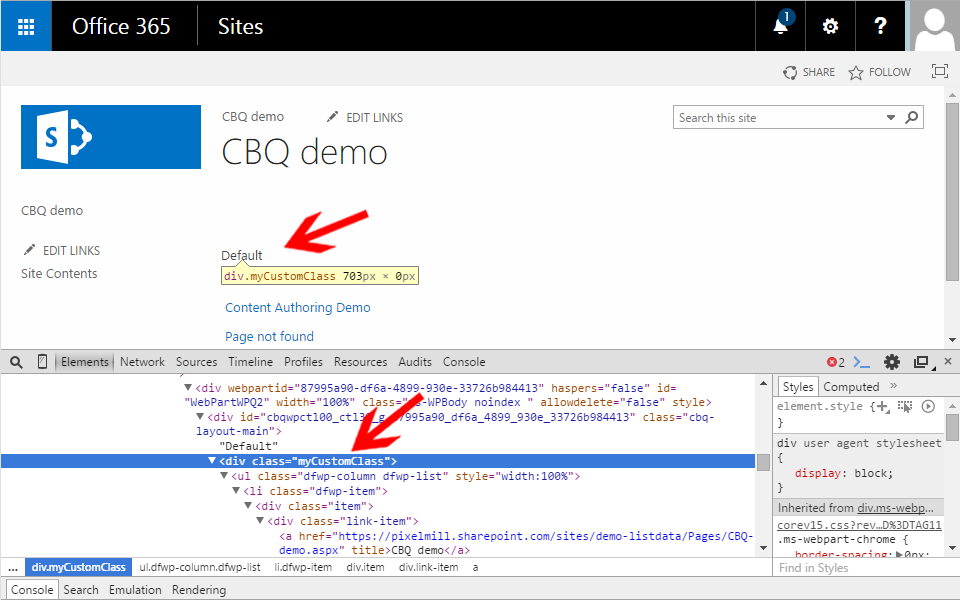
You might be wondering where you find ItemStyle values. In the example results above, in the webpart toolpane, I selected the item style, “Image On Left” which has an item style value of “Default“. You can always look in your ItemStyle.xsl to get Item Style values, or how about printing it in the script in ContentQueryMain.xsl by adding the following value-of tag.
1 | <xsl:value-of select="$Rows/@Style" disable-output-escaping="yes" /> |
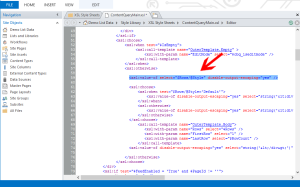
If we place the value-of tag just before our <choose> tag from above, then save and check in our ContentQueryMain.xsl, we should see the following results, assuming that our CBQ in question did in fact select the Item Style, “Image on Left“.
I have one more CBQ hack I will share shortly on targeting the last row in ItemStyle.xsl. In the mean time, check out my previous CBQ hack, Way Back Machine – Content Query Webpart Hacks – Reference the Webpart Title in a XSL Style Sheet.


Great! Thanks!